 WPF中文网
官方的说法是:命令是WPF 中的一种输入机制,与设备输入相比,它提供的输入处理更侧重于语义级别。我觉得这样的解释有点抽象,在实际的使用过程中我们会发现,传统的事件驱动模式下,比如一个按钮的Click单击事件,我们会给它订阅一个回调函数,以便触发该事件时,去执行这个回调函数的业务逻辑代码。
Button button = new Button();
button.Click += (s, e) =>
{
    MessageBox.Show("HelloWorld");
};
或者在XAML前端实例化一个Button,然后订阅Click事件。
//XAML代码
<Grid>
    <Button Content="确定" Click="Button_Click"/>
</Grid>

//C#代码
private void Button_Click(object sender, RoutedEventArgs e)
{
    MessageBox.Show("HelloWorld");
}
事件驱动模式有一个不太好的地方是,它的前端XAML代码和后端的C#代码建立了一种强关联的耦合关系,无法体现WPF的MVVM开发模式的优势, 于是,WPF提供了一个ICommand接口,以及一个强大的命令系统,将控件的各种事件都能转换成一个命令。这个命令依然像绑定依赖属性一样,将命令定义成一个ViewModel中的命令属性,而ViewModel又被赋值到控件或窗体的DataContext数据上下文中,于是,窗体内的所有控件的事件都可以绑定这个命令,只要控件的事件被触发,命令将会被执行。
WPF的命令是通过ICommand接口创建的,并且微软已经为我们预定义了一部分命令,这些我们都称为预定义命令,它们的类型是RoutedUICommand或RoutedCommand。RoutedUICommand继承于RoutedCommand,而RoutedCommand继承于ICommand。
事实上,在WPF应用开发过程中,光靠这些预定义命令是不足以满足我们的开发需求的,所以我们肯定要另写一些命令类型,当然,自定义命令必须继承于ICommand。
厘清这一点之后,我们就明白了接下来要学习的几个方面:
- 第一点:命令的4个主要概念,它解决了我们如何正确运用命令知识。
- 第二点:预定义命令的熟悉与使用。
- 第三点:自定义命令的定义与应用。
- 第四点:常见框架(例如Prism,mvvmlight,ReactiveUI)中的命令应用。
- 第五点:控件的普通事件转Command命令
第一点,WPF 命令中的四个主要概念
WPF 中的路由命令模型可分解为四个主要概念:命令、命令源、命令目标和命令绑定:
- 命令是要执行的操作。
- 命令源是调用命令的对象。
- 命令目标是在其上执行命令的对象。
- 命令绑定是将命令逻辑映射到命令的对象。
如上所述,命令其实就是ICommand接口的实现,命令源是调用命令的对象,这些对象一定会继承ICommandSource接口,而命令绑定就像是一座桥梁,它将命令与逻辑代码建立一种映射,这座桥梁就是CommandBinding。最后,命令如何与命令源建立绑定?当然就是Binding对象了。
较形象的总结一下命令的路线:ICommandSource命令源(或控件的事件)->绑定一个ICommand命令->CommandBinding桥梁->真正的业务逻辑代码块。
下一节,我们以这个路线先介绍命令源。
——重庆教主 2023年10月11日
ICommandSource其实是一个接口,我们观察ButtonBase基类会发现,它就继承了这个接口。
public abstract class ButtonBase : ContentControl, ICommandSource
{
    public static readonly RoutedEvent ClickEvent;
    public static readonly DependencyProperty CommandProperty;
    public static readonly DependencyProperty CommandParameterProperty;
    public static readonly DependencyProperty CommandTargetProperty;
    public static readonly DependencyProperty IsPressedProperty;
    public static readonly DependencyProperty ClickModeProperty;

    protected ButtonBase();

    public IInputElement CommandTarget { get; set; }
    public object CommandParameter { get; set; }
    public ICommand Command { get; set; }
    public bool IsPressed { get; protected set; }
    public ClickMode ClickMode { get; set; }
    protected override bool IsEnabledCore { get; }

    public event RoutedEventHandler Click;

    //以下省略

}
所以,Button,RadioButton,CheckBox,ToggleButton等这些子控件都具有成为一个命令源的天赋。那么我们不禁要去探索一下这个ICommandSource到底是什么接口。
public interface ICommandSource
{
    ICommand Command { get; }
    object CommandParameter { get; }
    IInputElement CommandTarget { get; }

}
其实它的内容也不多,就只有3个属性,分别是Command,CommandParameter 和CommandTarget 。
Command就是在调用命令源时执行的命令。
CommandParameter 表示可在执行命令时传递给该命令的用户定义的数据值。
CommandTarget 表示在其上执行该命令的对象。
所以,假如我们定义了一个叫OpenCommand的命令,并且这个OpenCommand是某个ViewModel中的属性,那么,我们的按钮就可以实现下面这样的写法。
<Grid>
    <Button Content="打开"
            Click="Button_Click"
            Command="{Binding OpenCommand}"
            CommandParameter="{Binding RelativeSource={RelativeSource Mode=Self}}"/>
</Grid>
在上面的例子中,我们即保留了Click事件的写法,同时也演示了Command命令的写法,以及CommandParameter命令参数的写法,这里采用了相对绑定的写法。
在这里,Button就是一个命令源(大多数情况下,命令源对象就是一个控件),OpenCommand是一个属性,但是这个属性的类型一定要继承ICommand接口,关于ICommand接口,我们会在下一节讲解。
——重庆教主 2023年10月11日
ICommand是WPF命令的代码协定,也就是说,WPF中所有的命令都要继承这个接口,不管是预定义命令还是自定义命令。
一、ICommand的定义
public interface ICommand
{
    //
    // 摘要:
    //     当出现影响是否应执行该命令的更改时发生。
    event EventHandler CanExecuteChanged;

    //
    // 摘要:
    //     定义确定此命令是否可在其当前状态下执行的方法。
    //
    // 参数:
    //   parameter:
    //     此命令使用的数据。 如果此命令不需要传递数据,则该对象可以设置为 null。
    //
    // 返回结果:
    //     如果可执行此命令,则为 true;否则为 false。
    bool CanExecute(object parameter);
    //
    // 摘要:
    //     定义在调用此命令时要调用的方法。
    //
    // 参数:
    //   parameter:
    //     此命令使用的数据。 如果此命令不需要传递数据,则该对象可以设置为 null。
    void Execute(object parameter);

}
这个接口比较关键的是CanExecute和Execute两个方法成员。前者表示当前命令是否可以执行,如果可以的话,WPF命令系统会自动帮我们去调用Execute方法成员。那么,我们要实现这个接口的话,通常只需要在CanExecute编写一些判断逻辑,在Execute调用一个委托就行了。至于这个委托的的签名和具体的代码内容,则是在实际应用时由开发者去编写不同的业务代码。接下来,我们来实现一个ICommand接口。
二、ICommand的实现
public class RelayCommand : ICommand
{
    public event EventHandler CanExecuteChanged;

    private Action action;

    public RelayCommand(Action action)
    {
        this.action = action;
    }

    public bool CanExecute(object parameter)
    {
        return true;
    }

    public void Execute(object parameter)
    {
        action?.Invoke();
    }
}
在上面的例子中,我们自定义了一个叫RelayCommand的Command类,非常重要的一点是,它的构造函数要求传入一个Action,这个委托传进来后,将来在Execute成员中被执行。
接下来,我们看看它的具体使用。
public class MainViewModel : ObservableObject
{
    public RelayCommand OpenCommand { get; set; } = new RelayCommand(() =>
    {
        MessageBox.Show("Hello,Command");
    });
}
我们在MainViewModel中编写了一个叫OpenCommand的属性,而属性的类型就是RelayCommand,在构造这个RelayCommand时,我们传入了一个匿名函数。如此,前端就可以绑定这个OpenCommand命令了。
前端代码
<Window x:Class="HelloWorld.MainWindow"
        xmlns="http://schemas.microsoft.com/winfx/2006/xaml/presentation"
        xmlns:x="http://schemas.microsoft.com/winfx/2006/xaml"
        xmlns:d="http://schemas.microsoft.com/expression/blend/2008"
        xmlns:mc="http://schemas.openxmlformats.org/markup-compatibility/2006"
        xmlns:local="clr-namespace:HelloWorld"
        xmlns:forms="clr-namespace:System.Windows.Forms;assembly=System.Windows.Forms"
        mc:Ignorable="d" FontSize="14"
        Title="WPF中文网 - 命令 - www.wpfsoft.com" Height="350" Width="500">
    <Window.DataContext>
        <local:MainViewModel/>
    </Window.DataContext>
    <Window.Resources>

    </Window.Resources>
    <Grid>
        <Button Width="100" Height="30" Content="打开" Command="{Binding OpenCommand}" />
    </Grid>
</Window>
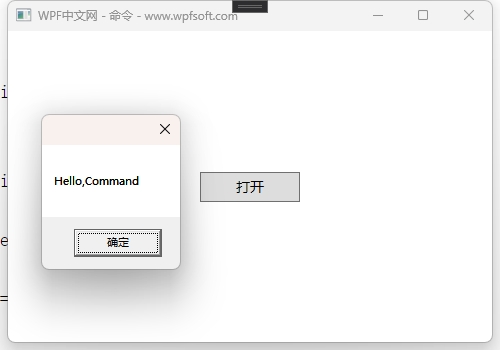
单击按钮,弹出对话框,说明OpenCommand所指向的匿名函数代码块被执行。这便是ICommand接口最简单的自定义实现之一,如果我们需要在单击按钮时传入一些参数该怎么办呢?这就需要稍微改一下RelayCommand的代码了。
三、ICommand带参数的实现
public class RelayCommand : ICommand
{
    public event EventHandler CanExecuteChanged;

    private Action action;
    private Action<object> objectAction;
    public RelayCommand(Action action)
    {
        this.action = action;
    }

    public RelayCommand(Action<object> objectAction)
    {
        this.objectAction = objectAction;
    }
    public bool CanExecute(object parameter)
    {
        return true;
    }

    public void Execute(object parameter)
    {
        action?.Invoke();
        objectAction?.Invoke(parameter);
    }
}
在这里,我们增加了一个带Action<object>参数的构造函数,将来定义命令时,就可以将一个带有object参数的方法传到这个RelayCommand中来。
MainViewModel代码如下
public class MainViewModel : ObservableObject
{
    public RelayCommand OpenCommand { get; set; } = new RelayCommand(() =>
    {
        MessageBox.Show("Hello,Command");
    });

    public RelayCommand OpenParamCommand { get; set; } = new RelayCommand((param) =>
    {
        MessageBox.Show(param.ToString());
    });

}
在MainViewModel中,我们增加了一个OpenParamCommand命令,并传入了一个带参数的匿名函数。最后看看前端代码如何调用。
<StackPanel VerticalAlignment="Center">
    <Button Width="100" Height="30" Content="打开" Command="{Binding OpenCommand}" />
    <Button Width="100" Height="30"
            Content="打开"
            Command="{Binding OpenParamCommand}"
            CommandParameter="{Binding RelativeSource={RelativeSource Mode=Self}}"/>
</StackPanel>

由此可见,我们利用CommandParameter属性将前端的button对象传递到了命令的回调函数中。虽然RelayCommand已经具备了参数的传递,但是,我们还有更优雅的方式去实现它。
四、ICommand的泛型参数实现
public class RelayCommand<T> : ICommand
{
    public event EventHandler CanExecuteChanged;
    public Action<T> Action { get; }
    public RelayCommand(Action<T> action)
    {
        Action = action;
    }
    public bool CanExecute(object parameter)
    {
        return true;
    }

    public void Execute(object parameter)
    {
        Action?.Invoke((T)parameter);
    }
}
我们利用泛型来简化了RelayCommand的定义,而在定义泛型RelayCommand和使用时,与前面带object参数的RelayCommand的用法是差不多的。
public RelayCommand<object> OpenTParamCommand { get; set; } = new RelayCommand<object>((t) =>
{
    MessageBox.Show(t.ToString());
});
当前课程源码下载:(注明:本站所有源代码请按标题搜索)
文件名:071-《ICommand接口》-源代码
链接:https://pan.baidu.com/s/1yu-q4tUtl0poLVgmcMfgBA
提取码:wpff
WPF 提供一组预定义命令。命令库包括以下类:ApplicationCommands、NavigationCommands、MediaCommands、EditingCommands 和 ComponentCommands。 这些类提供诸如 Cut、BrowseBack、BrowseForward、Play、Stop 和 Pause 的命令。这些类仅由 RoutedCommand 对象构成,而不包含命令的实现逻辑。 实现逻辑由在其上执行命令的对象负责。
我们来看看这几个类的定义。
一、ApplicationCommands的定义
public static class ApplicationCommands
{
    public static RoutedUICommand Cut { get; }
    public static RoutedUICommand Stop { get; }
    public static RoutedUICommand ContextMenu { get; }
    public static RoutedUICommand Properties { get; }
    public static RoutedUICommand PrintPreview { get; }
    public static RoutedUICommand CancelPrint { get; }
    public static RoutedUICommand Print { get; }
    public static RoutedUICommand SaveAs { get; }
    public static RoutedUICommand Save { get; }
    public static RoutedUICommand Close { get; }
    public static RoutedUICommand CorrectionList { get; }
    public static RoutedUICommand Open { get; }
    public static RoutedUICommand Help { get; }
    public static RoutedUICommand SelectAll { get; }
    public static RoutedUICommand Replace { get; }
    public static RoutedUICommand Find { get; }
    public static RoutedUICommand Redo { get; }
    public static RoutedUICommand Undo { get; }
    public static RoutedUICommand Delete { get; }
    public static RoutedUICommand Paste { get; }
    public static RoutedUICommand Copy { get; }
    public static RoutedUICommand New { get; }
    public static RoutedUICommand NotACommand { get; }

}
二、NavigationCommands 的定义
public static class NavigationCommands
{
    public static RoutedUICommand BrowseBack { get; }
    public static RoutedUICommand BrowseForward { get; }
    public static RoutedUICommand BrowseHome { get; }
    public static RoutedUICommand BrowseStop { get; }
    public static RoutedUICommand Refresh { get; }
    public static RoutedUICommand Favorites { get; }
    public static RoutedUICommand Search { get; }
    public static RoutedUICommand IncreaseZoom { get; }
    public static RoutedUICommand DecreaseZoom { get; }
    public static RoutedUICommand Zoom { get; }
    public static RoutedUICommand NextPage { get; }
    public static RoutedUICommand PreviousPage { get; }
    public static RoutedUICommand FirstPage { get; }
    public static RoutedUICommand LastPage { get; }
    public static RoutedUICommand GoToPage { get; }
    public static RoutedUICommand NavigateJournal { get; }

}
三、MediaCommands的定义
public static class MediaCommands
{
    public static RoutedUICommand Play { get; }
    public static RoutedUICommand DecreaseMicrophoneVolume { get; }
    public static RoutedUICommand IncreaseMicrophoneVolume { get; }
    public static RoutedUICommand BoostBass { get; }
    public static RoutedUICommand DecreaseBass { get; }
    public static RoutedUICommand IncreaseBass { get; }
    public static RoutedUICommand DecreaseTreble { get; }
    public static RoutedUICommand IncreaseTreble { get; }
    public static RoutedUICommand MuteVolume { get; }
    public static RoutedUICommand DecreaseVolume { get; }
    public static RoutedUICommand IncreaseVolume { get; }
    public static RoutedUICommand Select { get; }
    public static RoutedUICommand TogglePlayPause { get; }
    public static RoutedUICommand ChannelDown { get; }
    public static RoutedUICommand ChannelUp { get; }
    public static RoutedUICommand Rewind { get; }
    public static RoutedUICommand FastForward { get; }
    public static RoutedUICommand PreviousTrack { get; }
    public static RoutedUICommand NextTrack { get; }
    public static RoutedUICommand Record { get; }
    public static RoutedUICommand Stop { get; }
    public static RoutedUICommand Pause { get; }
    public static RoutedUICommand MuteMicrophoneVolume { get; }
    public static RoutedUICommand ToggleMicrophoneOnOff { get; }

}
四、EditingCommands的定义
public static class EditingCommands
{
public static RoutedUICommand ToggleInsert { get; }
public static RoutedUICommand SelectDownByParagraph { get; }
public static RoutedUICommand SelectUpByParagraph { get; }
public static RoutedUICommand SelectDownByPage { get; }
public static RoutedUICommand SelectUpByPage { get; }
public static RoutedUICommand SelectToLineStart { get; }
public static RoutedUICommand SelectToLineEnd { get; }
public static RoutedUICommand SelectToDocumentStart { get; }
public static RoutedUICommand SelectToDocumentEnd { get; }
public static RoutedUICommand ToggleBold { get; }
public static RoutedUICommand ToggleItalic { get; }
public static RoutedUICommand ToggleUnderline { get; }
public static RoutedUICommand ToggleSubscript { get; }
public static RoutedUICommand ToggleSuperscript { get; }
public static RoutedUICommand IncreaseFontSize { get; }
public static RoutedUICommand DecreaseFontSize { get; }
public static RoutedUICommand AlignLeft { get; }
public static RoutedUICommand AlignCenter { get; }
public static RoutedUICommand AlignRight { get; }
public static RoutedUICommand AlignJustify { get; }
public static RoutedUICommand ToggleBullets { get; }
public static RoutedUICommand ToggleNumbering { get; }
public static RoutedUICommand IncreaseIndentation { get; }
public static RoutedUICommand DecreaseIndentation { get; }
public static RoutedUICommand SelectUpByLine { get; }
public static RoutedUICommand SelectDownByLine { get; }
public static RoutedUICommand SelectLeftByWord { get; }
public static RoutedUICommand SelectRightByWord { get; }
public static RoutedUICommand Delete { get; }
public static RoutedUICommand Backspace { get; }
public static RoutedUICommand DeleteNextWord { get; }
public static RoutedUICommand DeletePreviousWord { get; }
public static RoutedUICommand EnterParagraphBreak { get; }
public static RoutedUICommand EnterLineBreak { get; }
public static RoutedUICommand TabForward { get; }
public static RoutedUICommand TabBackward { get; }
public static RoutedUICommand MoveRightByCharacter { get; }
public static RoutedUICommand MoveLeftByCharacter { get; }
public static RoutedUICommand MoveRightByWord { get; }
public static RoutedUICommand CorrectSpellingError { get; }
public static RoutedUICommand MoveLeftByWord { get; }
public static RoutedUICommand MoveUpByLine { get; }
public static RoutedUICommand MoveDownByParagraph { get; }
public static RoutedUICommand MoveUpByParagraph { get; }
public static RoutedUICommand MoveDownByPage { get; }
public static RoutedUICommand MoveUpByPage { get; }
public static RoutedUICommand MoveToLineStart { get; }
public static RoutedUICommand MoveToLineEnd { get; }
public static RoutedUICommand MoveToDocumentStart { get; }
public static RoutedUICommand MoveToDocumentEnd { get; }
public static RoutedUICommand SelectRightByCharacter { get; }
public static RoutedUICommand SelectLeftByCharacter { get; }
public static RoutedUICommand MoveDownByLine { get; }
public static RoutedUICommand IgnoreSpellingError { get; }

}
五、ComponentCommands的定义
public static class ComponentCommands
{
public static RoutedUICommand ScrollPageUp { get; }
public static RoutedUICommand MoveFocusBack { get; }
public static RoutedUICommand MoveFocusForward { get; }
public static RoutedUICommand MoveFocusDown { get; }
public static RoutedUICommand MoveFocusUp { get; }
public static RoutedUICommand SelectToPageDown { get; }
public static RoutedUICommand SelectToPageUp { get; }
public static RoutedUICommand SelectToEnd { get; }
public static RoutedUICommand SelectToHome { get; }
public static RoutedUICommand ExtendSelectionRight { get; }
public static RoutedUICommand ExtendSelectionLeft { get; }
public static RoutedUICommand ExtendSelectionDown { get; }
public static RoutedUICommand MoveFocusPageUp { get; }
public static RoutedUICommand ExtendSelectionUp { get; }
public static RoutedUICommand MoveToPageUp { get; }
public static RoutedUICommand MoveToEnd { get; }
public static RoutedUICommand MoveToHome { get; }
public static RoutedUICommand MoveDown { get; }
public static RoutedUICommand MoveUp { get; }
public static RoutedUICommand MoveRight { get; }
public static RoutedUICommand MoveLeft { get; }
public static RoutedUICommand ScrollByLine { get; }
public static RoutedUICommand ScrollPageRight { get; }
public static RoutedUICommand ScrollPageLeft { get; }
public static RoutedUICommand ScrollPageDown { get; }
public static RoutedUICommand MoveToPageDown { get; }
public static RoutedUICommand MoveFocusPageDown { get; }

}
这些命令都是RoutedUICommand类型,RoutedUICommand的父类是RoutedCommand,而RoutedCommand继承了ICommand接口。所以,本质上,RoutedUICommand也是一个ICommand对象。我们需要了解一下它的父类的定义
public class RoutedCommand : ICommand
{
      public RoutedCommand();
      public RoutedCommand(string name, Type ownerType);
      public RoutedCommand(string name, Type ownerType, InputGestureCollection inputGestures);

      public string Name { get; }
      public Type OwnerType { get; }
      public InputGestureCollection InputGestures { get; }

      public event EventHandler CanExecuteChanged;

      public bool CanExecute(object parameter, IInputElement target);
      public void Execute(object parameter, IInputElement target);

}
这些预先定义好的命令并没有实现业务逻辑,如果要实现业务逻辑,需要用到CommandBinding对象。下一节,我们将介绍CommandBinding对象在命令与逻辑代码中间发挥了什么关键性的作用。
——重庆教主 2023年10月11日
CommandBinding,顾名思义——命令绑定。这里并不是说将某个命令绑定到某个控件的事件上,而是将某个命令与一些逻辑代码进行绑定。至于命令如何绑定到控件上,或者在什么场景下绑定并调用命令,与CommandBinding无关。
我们首先来看看CommandBinding的定义
public class CommandBinding
{
    public CommandBinding();
    public CommandBinding(ICommand command);
    public CommandBinding(ICommand command, ExecutedRoutedEventHandler executed);
    public CommandBinding(ICommand command, ExecutedRoutedEventHandler executed,     CanExecuteRoutedEventHandler canExecute);

    public ICommand Command { get; set; }

    public event ExecutedRoutedEventHandler PreviewExecuted;
    public event ExecutedRoutedEventHandler Executed;
    public event CanExecuteRoutedEventHandler PreviewCanExecute;
    public event CanExecuteRoutedEventHandler CanExecute;

}
实例化一个CommandBinding对象,需要传入一个ICommand的命令对象, 以及ExecutedRoutedEventHandler委托和CanExecuteRoutedEventHandler委托。
ExecutedRoutedEventHandler委托里面的代码就是当前Command对象真正要执行的逻辑代码,这部分由程序员根据项目需求自己实现。
CanExecuteRoutedEventHandler委托是条件判断逻辑代码,表示当前的命令是否能够执行。
在了解了这些概念后,我们就可以用一个实际案例来说明WPF的预定义命令的用法。
第一步,实例化一个RoutedUICommand 命令
<Window.Resources>
<RoutedUICommand x:Key="PlayCommand" Text="Open"/>
</Window.Resources>
第二步,实例化一个CommandBinding对象
<Window.CommandBindings>
<CommandBinding Command="{StaticResource PlayCommand}"
                Executed="CommandBinding_Executed"
                CanExecute="CommandBinding_CanExecute"/>
</Window.CommandBindings>
这里需要定义两个回调函数。
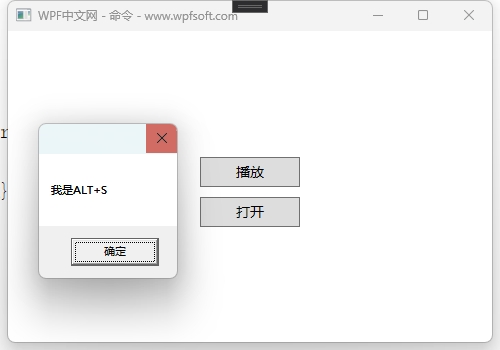
private void CommandBinding_Executed(object sender,ExecutedRoutedEventArgs e){
	MessageBox.Show("我是ALT+S");
}
private void CommandBinding_Executed(object sender,CanExecuteRoutedEventArgs e){
	e.CanExecute = true;
}
第三步,调用PlayCommand命令
<StackPanel VerticalAlignment="Center">
    <Button Width="100" Height="30"
            Content="播放" Margin="10"
            Command="{StaticResource PlayCommand}" />
</StackPanel>
由于我们在XAML中实例化的PlayCommand,所以引用时,必须以StaticResource 静态资源引用。
除了通过控件的Command属性去绑定PlayCommand命令,还有没有别的方式呢?有的!比如我们可以通过MouseBinding或者KeyBinding去绑定一个命令。
小小总结
Binding、MouseBinding、KeyBinding才是真正关注绑定命令的类型。
<Window.InputBindings>
    <!--鼠标+ctrl键触发command-->
    <MouseBinding Gesture="Control+WheelClick" Command="{StaticResource PlayCommand}"/>
    <!--快捷键触发command-->
    <KeyBinding Gesture="Alt+S" Command="{StaticResource PlayCommand}"/>
</Window.InputBindings>
完整的前端代码如下:
<Window x:Class="HelloWorld.MainWindow"
        xmlns="http://schemas.microsoft.com/winfx/2006/xaml/presentation"
        xmlns:x="http://schemas.microsoft.com/winfx/2006/xaml"
        xmlns:d="http://schemas.microsoft.com/expression/blend/2008"
        xmlns:mc="http://schemas.openxmlformats.org/markup-compatibility/2006"
        xmlns:local="clr-namespace:HelloWorld"
        xmlns:forms="clr-namespace:System.Windows.Forms;assembly=System.Windows.Forms"
        mc:Ignorable="d" FontSize="14"
        Title="WPF中文网 - 命令 - www.wpfsoft.com" Height="350" Width="500">
    <Window.DataContext>
        <local:MainViewModel/>
    </Window.DataContext>
    <Window.Resources>
        <RoutedUICommand x:Key="PlayCommand" Text="Play"/>
    </Window.Resources>
    <Window.CommandBindings>
        <CommandBinding Command="{StaticResource PlayCommand}"
                Executed="CommandBinding_Executed"
                CanExecute="CommandBinding_CanExecute"/>
    </Window.CommandBindings>
    <Window.InputBindings>
        <!--鼠标+ctrl键触发command-->
        <MouseBinding Gesture="Control+WheelClick" Command="{StaticResource PlayCommand}"/>
        <!--快捷键触发command-->
        <KeyBinding Gesture="Alt+S" Command="{StaticResource PlayCommand}"/>
    </Window.InputBindings>
    <StackPanel VerticalAlignment="Center">
        <Button Width="100" Height="30"
                Content="播放" Margin="10"
                Command="{StaticResource PlayCommand}" />
        <Button Width="100" Height="30"
                Content="打开"
                Command="{Binding OpenParamCommand}"
                CommandParameter="{Binding RelativeSource={RelativeSource Mode=Self}}"/>
    </StackPanel>
</Window>
F5运行之后,我们可以单击按钮、或者按下键盘Alt+S、或者按下Ctrl键+鼠标滚轮,都可以触发PlayCommand命令。
当前课程源码下载:(注明:本站所有源代码请按标题搜索)
文件名:072-《CommandBinding命令绑定》-源代码
链接:https://pan.baidu.com/s/1yu-q4tUtl0poLVgmcMfgBA
提取码:wpff
——重庆教主 2023年10月11日
这一节我们来演示一下ApplicationCommands预定义命令的使用,通过一个建议的记事本开发流程,掌握ApplicationCommands预定义命令的用法。
使用预定义命令,最重要的三个地方,第一点,如何通过CommandBinding对象去关联一个Command,第二点,如何编写命令的业务代码,第三点,命令如何触发,或者说,命令如何绑定到命令源对象。
第一点,通过CommandBinding对象去关联一个Command
<Window.CommandBindings>
    <CommandBinding Command="ApplicationCommands.Open"
                    CanExecute="OpenCommandCanExecute"
                    Executed="OpenCommandExecuted"  />

    <CommandBinding Command="ApplicationCommands.Cut"
                    CanExecute="CutCommandCanExecute"
                    Executed="CutCommandExecuted" />

    <CommandBinding Command="ApplicationCommands.Paste"
                    CanExecute="PasteCommandCanExecute"
                    Executed="PasteCommandExecuted" />

    <CommandBinding Command="ApplicationCommands.Save"
                    CanExecute="SaveCommandCanExecute"
                    Executed="SaveCommandExecuted" />
</Window.CommandBindings>
在Window窗体的CommandBindings集合中,我们实例化了4个CommandBinding对象,分别关联了Open、Cut、Paste和Save,对应打开、剪切、粘贴和保存。
第二点,如何编写命令的业务代码
private void OpenCommandCanExecute(object sender, CanExecuteRoutedEventArgs e)
{
    e.CanExecute = true;
}

private void OpenCommandExecuted(object sender, ExecutedRoutedEventArgs e)
{
    var openFileDialog = new Microsoft.Win32.OpenFileDialog()
    {
        Filter = "文本文档 (.txt)|*.txt",
        Multiselect = true
    };
    var result = openFileDialog.ShowDialog();
    if (result.Value)
    {
        textbox.Text = File.ReadAllText(openFileDialog.FileName);
    }
}

private void CutCommandCanExecute(object sender, CanExecuteRoutedEventArgs e)
{
    e.CanExecute = textbox != null && textbox.SelectionLength > 0;
}

private void CutCommandExecuted(object sender, ExecutedRoutedEventArgs e)
{
    textbox.Cut();
}

private void PasteCommandCanExecute(object sender, CanExecuteRoutedEventArgs e)
{
    e.CanExecute = Clipboard.ContainsText();
}

private void PasteCommandExecuted(object sender, ExecutedRoutedEventArgs e)
{
    textbox.Paste();
}

private void SaveCommandCanExecute(object sender, CanExecuteRoutedEventArgs e)
{
    e.CanExecute = textbox != null && textbox.Text.Length > 0;
}

private void SaveCommandExecuted(object sender, ExecutedRoutedEventArgs e)
{
    var saveFileDialog = new Microsoft.Win32.SaveFileDialog
    {
        Filter = "文本文档 (.txt)|*.txt"
    };

    if (saveFileDialog.ShowDialog() == true)
    {
        File.WriteAllText(saveFileDialog.FileName , textbox.Text);
    }
}
我们需要给Command的CanExecute和Executed成员分别创建各自的回调函数,并在函数中编写自己的业务逻辑。
第三点,命令如何绑定到命令源对象
绑定命令的方式通常是通过控件的事件、或者响应键盘或鼠标的操作去实现的,在这里,我们演示这两种方法,第一种是通过快捷键去绑定上面的命令。
<Window.InputBindings>
    <KeyBinding Key="O" Modifiers="Control" Command="ApplicationCommands.Open" />
    <KeyBinding Key="X" Modifiers="Control" Command="ApplicationCommands.Cut" />
    <KeyBinding Key="V" Modifiers="Control" Command="ApplicationCommands.Paste" />
    <KeyBinding Key="S" Modifiers="Control" Command="ApplicationCommands.Save" />
</Window.InputBindings>
这些KeyBinding可以定义快捷键,并指向某个命令。第二种方式就是创建一个前端控件,比如实例化一个按钮,利用按钮的Command绑定命令。
<Grid>
<Grid.RowDefinitions>
<RowDefinition Height="auto"/>
<RowDefinition/>
</Grid.RowDefinitions>
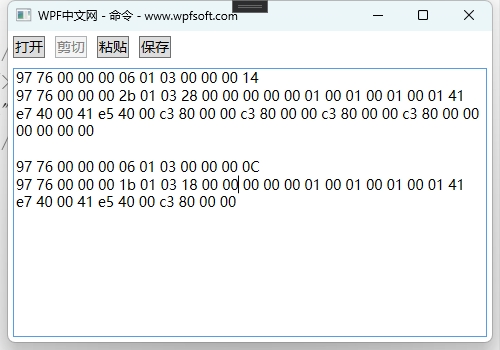
<StackPanel Orientation="Horizontal">
<Button Content="打开" Margin="5" Command="ApplicationCommands.Open"/>
<Button Content="剪切" Margin="5" Command="ApplicationCommands.Cut"/>
<Button Content="粘贴" Margin="5" Command="ApplicationCommands.Paste"/>
<Button Content="保存" Margin="5" Command="ApplicationCommands.Save"/>
</StackPanel>
<TextBox x:Name="textbox" Grid.Row="1" Margin="5" TextWrapping="Wrap">
</TextBox>
</Grid>
坦白说,WPF的预定义命令并不常用,但是作为开发者,还是很有必要全面了解一下相关知识。我们更多时候还是使用ICommand的自定义命令,下一讲,我们将介绍控件的其它事件如何去引用一个命令。
当前课程源码下载:(注明:本站所有源代码请按标题搜索)
文件名:071-《ApplicationCommands与记事本开发实战》-源代码
链接:https://pan.baidu.com/s/1yu-q4tUtl0poLVgmcMfgBA
提取码:wpff
——重庆教主 2023年10月12日
通过前面的学习,我们发现Button拥有Command属性,开发者可以为其设置一条命令,当用户单击按钮的时候便执行这条命令。但是,一个控件往往不止一个事件,比如UIElement基类中便定义了大量的事件,PreviewMouseDown表示鼠标按下时引发的事件。
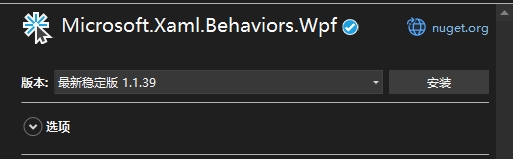
如何在PreviewMouseDown事件触发时去执行一条命令呢?这时候就需要用到WPF提供的一个组件,它的名字叫Microsoft.Xaml.Behaviors.Wpf,我们可以在nuget管理器中找到并下载安装它。
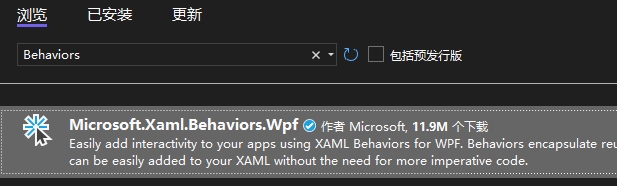
安装Microsoft.Xaml.Behaviors.Wpf。
然后,我们在window窗体中引入它的命名空间。
xmlns:i="http://schemas.microsoft.com/xaml/behaviors"
最后,我们以TextBox为例,因为TextBox也是UIElement基类的子类控件,所以,它也有PreviewMouseDown事件。
<TextBox x:Name="textbox" Grid.Row="1" Margin="5" TextWrapping="Wrap">
    <i:Interaction.Triggers>
        <i:EventTrigger EventName="PreviewMouseDown">
            <i:InvokeCommandAction Command="{Binding MouseDownCommand}"
                                   CommandParameter="{Binding RelativeSource={RelativeSource Mode=FindAncestor,AncestorType=TextBox}}">
            </i:InvokeCommandAction>
        </i:EventTrigger>
    </i:Interaction.Triggers>
</TextBox>
从上面的例子中,我们会发现,在TextBox 控件中增加了一个Interaction.Triggers附加属性,这个属性是一个集合,表示可以实例化多个Trigger触发器,于是,我们实例化了一个EventTrigger ,并指明它的EventName为PreviewMouseDown事件,关联的命令要写在InvokeCommandAction 对象中,命令绑定的方式采用Binding即可。然后我们来看看MouseDownCommand的执行代码:
public RelayCommand<TextBox> MouseDownCommand { get; set; } = new RelayCommand<TextBox>((textbox) =>
{
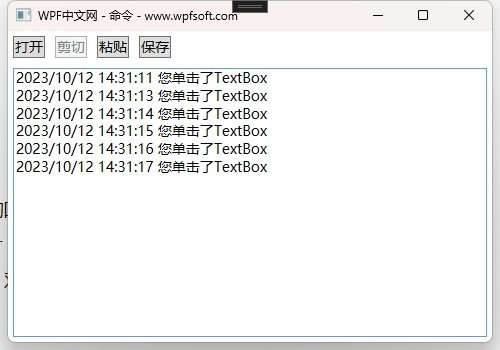
textbox.Text += DateTime.Now + " 您单击了TextBox" + "\r";
});
在TextBox控件上单击鼠标时,执行MouseDownCommand 命令,同时将TextBox控件传入到命令的匿名回调函数中。
当前课程源码下载:(注明:本站所有源代码请按标题搜索)
文件名:074-《WPF事件转命令》-源代码
链接:https://pan.baidu.com/s/1yu-q4tUtl0poLVgmcMfgBA
提取码:wpff
——重庆教主 2023年10月12日
MVVMLight是一个实现MVVM模式的轻量级框架(相对于Prism),适用于Net framework版本下的WPF程序,目前已经停止维护,但是作为轻量及的开发框架,完全可以适用中小型的项目开发。它提供了IOC容器、MVMM模式、消息机制、对话框、命令等功能。本文将介绍如何安装mvvmlight以及使用它的Command命令。
一、下载安装mvvmlight框架
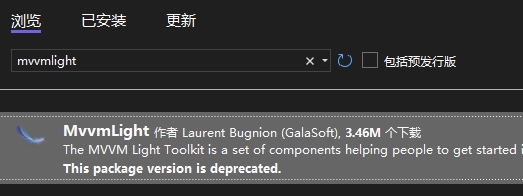
在nuget管理器中搜索mvvmlight,找到后下载安装即可。安装结束后,它会为我们的项目创建一个ViewModel的文件夹,并在其中创建两个类:ViewModelLocator和MainViewModel

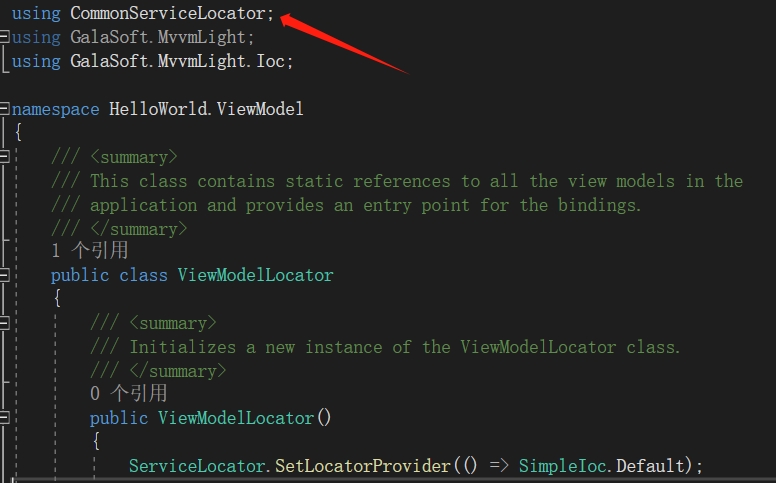
由于本文只演示它的命令用法,所以就不展开mvvmlight的完整使用。需要注意的是,默认安装后,需要解决一个问题。那就是ViewModelLocator类报错问题。
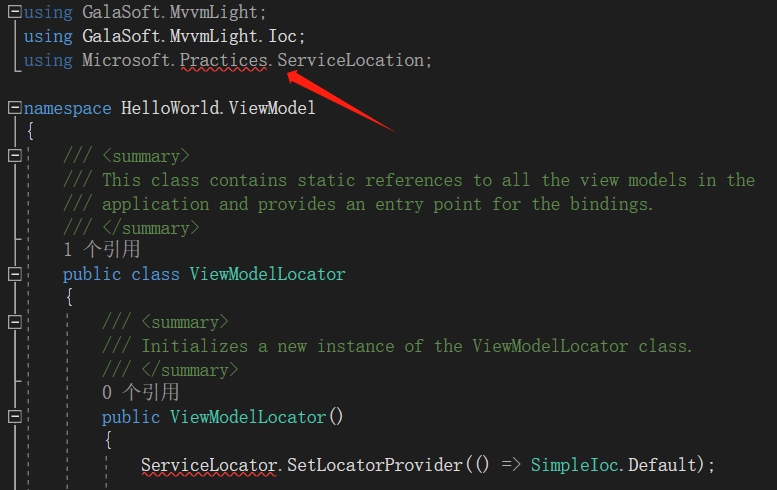
这个问题就是ServiceLocator的命令空间已经不在Microsoft.Practices.ServiceLocation之中,而在CommonServiceLocator之中,所以需要将其替换一下。
然后,我们就可以在前面的示例的MainViewModel中,新建一条命令。
public class MainViewModel : ObservableObject
{
    public GalaSoft.MvvmLight.Command.RelayCommand<string> MvvmlightCommand { get; }
    public MainViewModel()
    {
        MvvmlightCommand = new GalaSoft.MvvmLight.Command.RelayCommand<string>((message) =>
        {
            MessageBox.Show(message);
        });
    }
}
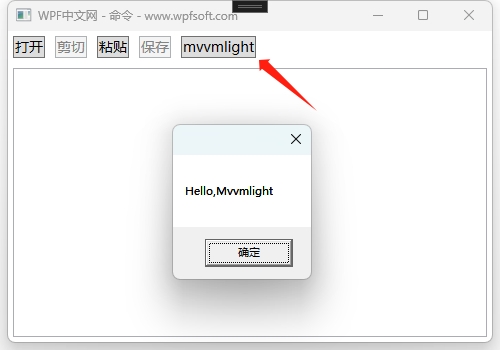
最后,我们在前端用一个Button来引用这个命令
<Button Content="mvvmlight"
        Margin="5"
        Command="{Binding MvvmlightCommand}"
        CommandParameter="Hello,Mvvmlight"/>
mvvmlight框架的命令也是叫RelayCommand,同时它还有带泛型参数的RelayCommand命令。所以,大多数时候, 我们会直接安装mvvmlight、prism、ReactiveUI或者CommunityToolkit.Mvvm框架,这一类框架都是帮助我们更好的实现软件架构,所提供的功能也是大同小异,起码最基本的MVVM功能都得到了实现。
如果您理解了在前面的课程中如何实现ICommand接口,那么,这些框架中提供的命令,使用起来就变得简单许多。
当前课程源码下载:(注明:本站所有源代码请按标题搜索)
文件名:075-《mvvmlight框架之RelayCommand》-源代码
链接:https://pan.baidu.com/s/1yu-q4tUtl0poLVgmcMfgBA
提取码:wpff
前面提到过prism框架,它也有定义好的命令,本节课就来介绍一下这个框架的安装与命令的使用。
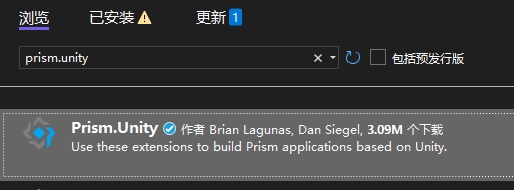
一、下载安装Prism框架
打开nuget包管理器,搜索prism.unity关键词,下载Prism.Unity组件。
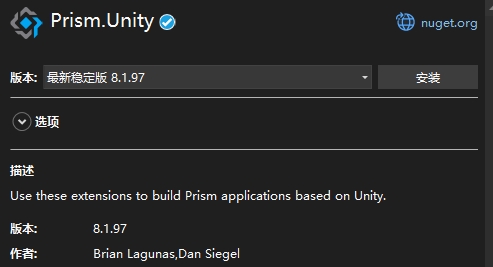
目前最新版本为8.1.97,Unity其实是一个IOC容器,而prism则包含了这个容器,安装完成后,会在项目的引用中找到prism的身影。
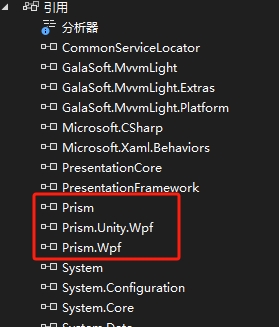
一共有3个项目,分别是prism,prism.unity.wpf和prism.wpf。正确安装好Prism框架后,我们就可以使用它的命令了,Prism框架提供了DelegateCommand、DelegateCommand<T>和CompositeCommand三种命令,分别是无参命令、有参命令和合并命令。
二、prism框架的命令
使用prism提供的命令分为两步,第一步定义命令,第二步调用命令。首先在C#后端的ViewModel中定义上述3种命令。
public class MainViewModel : ObservableObject
{
    public DelegateCommand DelegateCommand { get; }
    public DelegateCommand<string> ParamCommand { get; }
    public CompositeCommand CompositeCommand { get; }
    public GalaSoft.MvvmLight.Command.RelayCommand<string> MvvmlightCommand { get; }
    public MainViewModel()
    {
        DelegateCommand = new DelegateCommand(() =>
        {
            MessageBox.Show("无参的DelegateCommand");
        });

        ParamCommand = new DelegateCommand<string>((message) =>
        {
            MessageBox.Show(message);
        });
        CompositeCommand = new CompositeCommand();
        CompositeCommand.RegisterCommand(DelegateCommand);
        CompositeCommand.RegisterCommand(ParamCommand);

        MvvmlightCommand = new GalaSoft.MvvmLight.Command.RelayCommand<string>((message) =>
        {
            MessageBox.Show(message);
        });
    }
}
在这里,我们保留了上一节课定义的MvvmLight中的命令,方便对比,其实除了类型名不同,使用方式是相同的。CompositeCommand 合并命令需要先实例化,再通过它的RegisterCommand将需要合并执行的命令注册到其中,然后在前端用三个按钮分别绑定这3个命令。
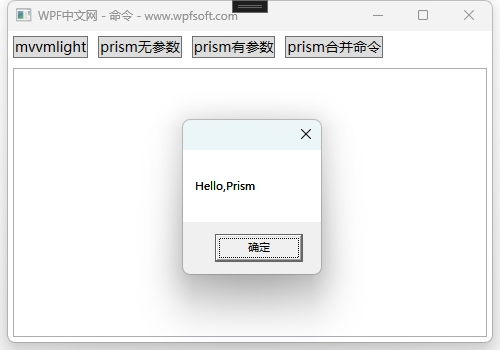
<Button Content="prism无参数"
        Margin="5"
        Command="{Binding DelegateCommand}"
        CommandParameter="Hello,Prism"/>
<Button Content="prism有参数"
        Margin="5"
        Command="{Binding ParamCommand}"
        CommandParameter="Hello,Prism"/>
<Button Content="prism合并命令"
        Margin="5"
        Command="{Binding CompositeCommand}"
        CommandParameter="Hello,Prism"/>
当单击“合并命令”按钮时,会依次执行前面两个命令。
当前课程源码下载:(注明:本站所有源代码请按标题搜索)
文件名:076-《Prism之DelegateCommand》-源代码
链接:https://pan.baidu.com/s/1yu-q4tUtl0poLVgmcMfgBA
提取码:wpff
——重庆教主 2023年10月12日
ReactiveUI 是集成了 .Net 的 ReatIve 扩展的 MVVM 框架,用来创建运行与任何移动设备或者桌面平台的优雅的可测试的用户接口。它支持 Xamarin.iOS,Xamarin.Android,Xamarin.Mac, WPF,Windows Forms,Windows Phone 8 和 Windows Store 应用程序。
ReactiveUI是一个可组合的跨平台模型 - 视图 - 视图模型框架,适用于所有.NET平台,受功能性反应式编程的启发。它允许您在一个可读位置围绕功能表达想法,从用户界面抽象出可变状态,并提高应用程序的可测试性
反应式编程简介
很久以前,当计算机编程首次出现时,机器必须手动编程。如果技术人员以正确的顺序输入正确的机器代码序列,则生成的程序行为将满足业务要求。而不是告诉计算机如何完成它的工作,哪个容易出错并且过分依赖于程序员的无懈可击,为什么我们不告诉它它的工作是什么,让它把剩下的工作弄清楚了?
ReactiveUI的灵感来自功能反应式编程的范例,它允许您将用户输入建模为随时间变化的函数。这非常酷,因为它允许您从用户界面中抽象出可变状态,并在一个可读位置表达功能,同时提高应用程序可测试性。
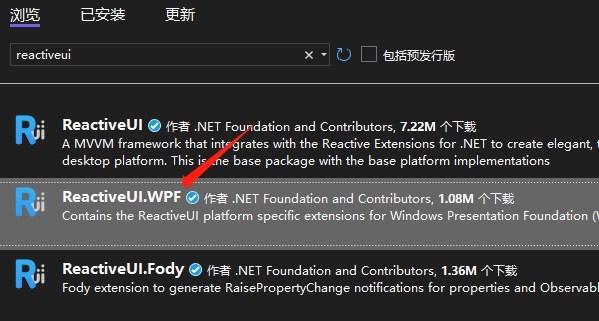
如何安装ReactiveUI组件?在VisualStdio的nuget包管理器中搜索关键字,请安装ReactiveUI.WPF版本,安装结束后,会在项目的引用中看到ReactiveUI和ReactiveUI.WPF。
如何在ReactiveUI中使用命令?ReactiveCommand是使用静态工厂方法创建的,该方法允许您创建同步或异步执行的命令逻辑。在ReactiveCommand类型中提供了一系列的以Create开头的静态方法,这些方法可以创建不同的命令。ReactiveCommand命令继承了一个带泛型的命令基类ReactiveCommandBase<TParam,TResult>,所以它的回调函数都是带有参数和返回值的,如果无需传参及返回值,可将泛型实参写成Unit。另外,ReactiveUI采用了大量的观察者模式,所以在创建命令时,还可以使用IObservable执行逻辑,并去订阅当前命令,当命令执行后,再去执行订阅回调函数。下面我简单罗列一下ReactiveUI命令的创建方式。
Create()创建一个命令,执行同步Func或Action。
CreateCombined()创建一个合并命令,可一次性执行多个命令。
CreateFromObservable()创建一个命令,使用IObservable执行逻辑。
CreateFromTask()创建一个命令,执行C#任务,允许使用C#async/await运算符。
CreateRunInBackground()创建一个背景命令。
ReactiveCommand示例
首先,我们创建一个MainViewModel,并在其中声明一些命令。
internal class MainViewModel:ReactiveObject
{
    public ICommand GeneralCommand { get; }
    public ICommand ParameterCommand { get; }
    public ICommand TaskCommand { get; }
    public ICommand CombinedCommand { get; }
    public ReactiveCommand<Unit,DateTime> ObservableCommand { get; }
    public MainViewModel()
    {
        GeneralCommand = ReactiveCommand.Create(General);
        ParameterCommand = ReactiveCommand.Create<object, bool>(Parameter);
        TaskCommand = ReactiveCommand.CreateFromTask(RunAsync);

        var childCommand = new List<ReactiveCommandBase<Unit,Unit>>();
        childCommand.Add(ReactiveCommand.Create<Unit, Unit>((o) =>
        {

            MessageBox.Show("childCommand1");
            return Unit.Default;
        }));
        childCommand.Add(ReactiveCommand.Create<Unit, Unit>((o) =>
        {
            MessageBox.Show("childCommand2");
            return Unit.Default;
        }));
        childCommand.Add(ReactiveCommand.Create<Unit, Unit>((o) =>
        {
            MessageBox.Show("childCommand3");
            return Unit.Default;
        }));

        CombinedCommand = ReactiveCommand.CreateCombined(childCommand);

        ObservableCommand = ReactiveCommand.CreateFromObservable<Unit, DateTime>(DoObservab
        ObservableCommand.Subscribe(v => ShowObservableResult(v));

    }

    private void RunInBackground()
    {
        throw new NotImplementedException();
    }

    private IObservable<DateTime> DoObservableCommand(Unit arg)
    {
        //todo 业务代码

        var result = DateTime.Now;

        return Observable.Return(result).Delay(TimeSpan.FromSeconds(1));
    }

    private void ShowObservableResult(DateTime v)
    {
        MessageBox.Show($"时间:{v}");
    }

    private async Task RunAsync()
    {
        await Task.Delay(3000);
    }

    private bool Parameter(object arg)
    {
        MessageBox.Show(arg.ToString());
        return true;
    }

    private void General()
    {
        MessageBox.Show("ReactiveCommand!");
    }
}
在这个示例中,并分演示了ReactiveCommand的普通命令、带参命令、Task命令、合并命令和观察者命令的用法。接下来创建XAML前端控件对象,将这些命令绑定到Button上面。
<Window x:Class="HelloWorld.MainWindow"
xmlns="http://schemas.microsoft.com/winfx/2006/xaml/presentation"
xmlns:x="http://schemas.microsoft.com/winfx/2006/xaml"
xmlns:d="http://schemas.microsoft.com/expression/blend/2008"
xmlns:mc="http://schemas.openxmlformats.org/markup-compatibility/2006"
xmlns:local="clr-namespace:HelloWorld"
mc:Ignorable="d"
Title="WPF从小白到大佬 - 命令" Height="350" Width="500">
<Window.DataContext>
<local:MainViewModel/>
</Window.DataContext>
<StackPanel>
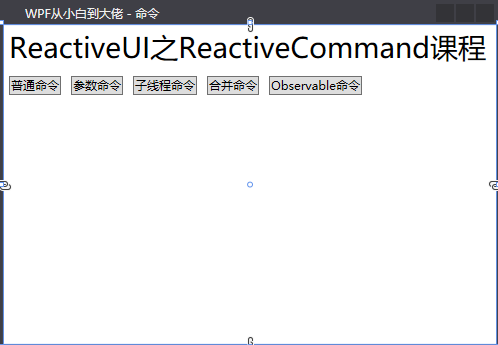
<TextBlock Text="ReactiveUI之ReactiveCommand课程" FontSize="28" Margin="5"/>
<StackPanel Orientation="Horizontal">
<Button Margin="5" Content="普通命令" Command="{Binding GeneralCommand}"/>
<Button Margin="5" Content="参数命令" Command="{Binding ParameterCommand}"
CommandParameter="Hello,Parameter"/>
<Button Margin="5" Content="子线程命令" Command="{Binding TaskCommand}"/>
<Button Margin="5" Content="合并命令" Command="{Binding CombinedCommand}"/>
<Button Margin="5" Content="Observable命令" Command="{Binding ObservableCommand}"/>
</StackPanel>
</StackPanel>
</Window>
当前课程源码下载:(注明:本站所有源代码请按标题搜索)
文件名:077-《ReactiveUI之ReactiveCommand》-源代码
链接:https://pan.baidu.com/s/1yu-q4tUtl0poLVgmcMfgBA
提取码:wpff
——重庆教主 2023年10月17日