EventTrigger,表示某个事件发生时,执行某一组操作,而这一组操作,通常是对当前控件或其它控件的属性做一些改变。我们先来看看它的定义。
一、EventTrigger的定义
[ContentProperty("Actions")]
public class EventTrigger : TriggerBase, IAddChild
{
    public EventTrigger();
    public EventTrigger(RoutedEvent routedEvent);

    public RoutedEvent RoutedEvent { get; set; }
    public string SourceName { get; set; }
    public TriggerActionCollection Actions { get; }

    public bool ShouldSerializeActions();
    protected virtual void AddChild(object value);
    protected virtual void AddText(string text);

}
RoutedEvent :表示一个事件,用来激活当前触发器。
SourceName:表示一个控件的名称,即是哪个控件的事件发生后,去激活事件触发器。
Actions :获取事件发生时要应用的操作的集合。这个集合的元素只能是BeginStoryboard,表示开始一个故事板,故事板里面将会执行一个动画。
关于动画,我们会在后面的章节中详细讲解,本例中,我们将以DoubleAnimation动画和DoubleAnimationUsingKeyFrames关键帧动画去执行一组操作。
二、EventTrigger示例
前端代码
<Window x:Class="HelloWorld.MainWindow"
        xmlns="http://schemas.microsoft.com/winfx/2006/xaml/presentation"
        xmlns:x="http://schemas.microsoft.com/winfx/2006/xaml"
        xmlns:d="http://schemas.microsoft.com/expression/blend/2008"
        xmlns:mc="http://schemas.openxmlformats.org/markup-compatibility/2006"
        xmlns:local="clr-namespace:HelloWorld"
        xmlns:forms="clr-namespace:System.Windows.Forms;assembly=System.Windows.Forms"
        mc:Ignorable="d" FontSize="14"
        Title="WPF中文网之数据绑定 - www.wpfsoft.com" Height="350" Width="500">
    <Window.Resources>
        <Storyboard x:Key="OnChecked">
            <DoubleAnimationUsingKeyFrames Storyboard.TargetProperty="(FrameworkElement.Width)" Storyboard.TargetName="_LeftBorder">
                <EasingDoubleKeyFrame KeyTime="0:0:0.2" Value="0"/>
            </DoubleAnimationUsingKeyFrames>
        </Storyboard>
        <Storyboard x:Key="OnUnchecked">
            <DoubleAnimationUsingKeyFrames Storyboard.TargetProperty="(FrameworkElement.Width)" Storyboard.TargetName="_LeftBorder">
                <EasingDoubleKeyFrame KeyTime="0:0:0.2" Value="200"/>
            </DoubleAnimationUsingKeyFrames>
        </Storyboard>
    </Window.Resources>
    <Window.Triggers>
        <EventTrigger RoutedEvent="ToggleButton.Checked" SourceName="_CheckBox">
            <BeginStoryboard Storyboard="{StaticResource OnChecked}"/>
        </EventTrigger>
        <EventTrigger RoutedEvent="ToggleButton.Unchecked" SourceName="_CheckBox">
            <BeginStoryboard Storyboard="{StaticResource OnUnchecked}"/>
        </EventTrigger>
    </Window.Triggers>
    <Grid>
        <Grid.ColumnDefinitions>
            <ColumnDefinition Width="auto"/>
            <ColumnDefinition/>
        </Grid.ColumnDefinitions>
        <Border Grid.Column="0" x:Name="_LeftBorder" Width="188" Background="LightCyan">
            <TextBlock Text="菜单区域" HorizontalAlignment="Center" VerticalAlignment="Center"/>
        </Border>
        <Border Grid.Column="1" x:Name="_RightBorder" >
            <CheckBox x:Name="_CheckBox">
                <CheckBox.Style>
                    <Style TargetType="CheckBox">
                        <Setter Property="Width" Value="50"/>
                        <Setter Property="Height" Value="50"/>
                        <Setter Property="Content" Value="开"/>
                        <Setter Property="Background" Value="LightGreen"/>
                        <Setter Property="Template">
                            <Setter.Value>
                                <ControlTemplate TargetType="CheckBox">
                                    <Border Width="{TemplateBinding Width}" Height="{TemplateBinding Height}" CornerRadius="60" Background="{TemplateBinding Background}">
                                        <TextBlock Text="{TemplateBinding Content}" HorizontalAlignment="Center" VerticalAlignment="Center"/>
                                    </Border>
                                </ControlTemplate>
                            </Setter.Value>
                        </Setter>
                        <Style.Triggers>
                            <Trigger Property="IsChecked" Value="True">
                                <Setter Property="Background" Value="Red"/>
                                <Setter Property="Foreground" Value="White"/>
                                <Setter Property="Content" Value="关"/>
                            </Trigger>
                            <EventTrigger RoutedEvent="MouseEnter">
                                <EventTrigger.Actions>
                                    <BeginStoryboard>
                                        <Storyboard>
                                            <DoubleAnimation Duration="0:0:0.300" Storyboard.TargetProperty="Width" To="60" />
                                            <DoubleAnimation Duration="0:0:0.300" Storyboard.TargetProperty="Height" To="60" />
                                        </Storyboard>
                                    </BeginStoryboard>
                                </EventTrigger.Actions>
                            </EventTrigger>
                            <EventTrigger RoutedEvent="MouseLeave">
                                <EventTrigger.Actions>
                                    <BeginStoryboard>
                                        <Storyboard>
                                            <DoubleAnimation Duration="0:0:0.300" Storyboard.TargetProperty="Width" To="50" />
                                            <DoubleAnimation Duration="0:0:0.300" Storyboard.TargetProperty="Height" To="50" />
                                        </Storyboard>
                                    </BeginStoryboard>
                                </EventTrigger.Actions>
                            </EventTrigger>
                        </Style.Triggers>
                    </Style>
                </CheckBox.Style>
            </CheckBox>
        </Border>
    </Grid>

</Window>

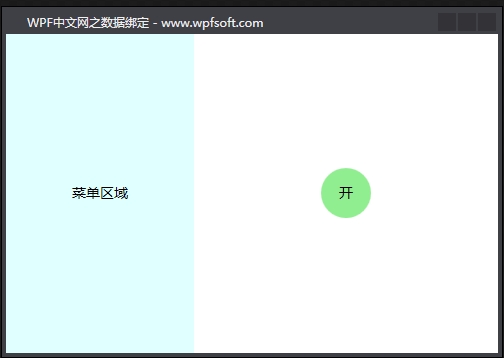
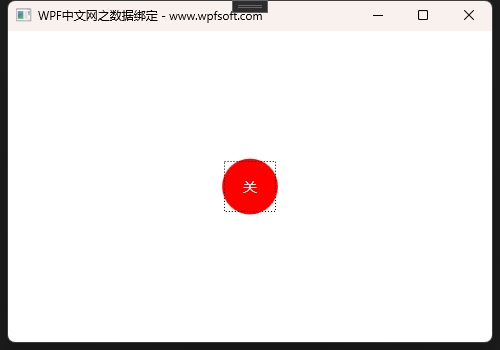
我们先来看看DoubleAnimation动画演示。
我们为CheckBox控件编写了一个样式,在样式的Triggers集合中,实例化了两个EventTrigger ,对应的事件分别是CheckBox控件MouseEnter和MouseLeave事件,在各自的触发器中又分别实例化了两个DoubleAnimation对象,当鼠标进入时,改变CheckBox的宽度和高度为60,当鼠标移出时,还原为50。
然后,我们来看看DoubleAnimationUsingKeyFrames动画演示。
首先我们在Window.Resources中定义了两个故事板,分别改变_LeftBorder控件的宽度,什么时候执行这两个故事板?这个时候,我们在Window.Triggers中实例化了两个EventTrigger,条件是当_CheckBox的Checked事件触发时,将_LeftBorder控件的宽度改为0,当_CheckBox的UnChecked事件触发器,将_LeftBorder控件的宽度改为188,由于是关键帧动画,所以,我们会看到左侧的菜单区域被缓缓关闭和打开。

利用EventTrigger和WPF动画,我们就可以在XAML前端实现很多事件操作特效,让UI的交互更加友好。
当前课程源码下载:(注明:本站所有源代码请按标题搜索)
文件名:060-《EventTrigger事件触发器》-源代码
链接:https://pan.baidu.com/s/1yu-q4tUtl0poLVgmcMfgBA
提取码:wpff
——重庆教主 2023年9月19日
 WPF中文网